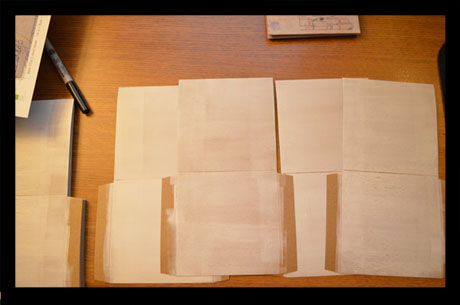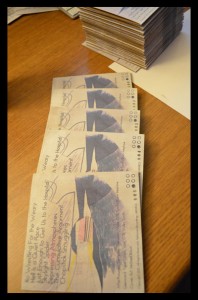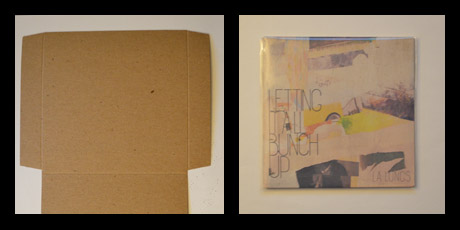
1. Blank chipboard 2. Coated chipboard 3. Printed flat 4. Glued, assembled and wrapped
The packaging of music has fascinated me for years. I have always had a fetish for CDs, cassettes and LPs. When CDs were packaged in larger rectangular cardboard boxes (probably to be more like a rectangular record) I used to keep the front and backs of the boxes and hang them on my wall. I lamented the record companies going the way of just shrink wrapping and stickering the cases closed. Those stickers still piss me off.
When I decide on what packaging I am going to use for a particular release it typically comes down to whether I am going to make the packaging myself or if I am going to find outside help. Every release Aphonia produces has a specific design goal and this usually stems from the art and cover design itself. In years past both Ben and I would design some artwork ourselves (with input from the artists) and we still do from time to time. Lately we have preferred the input of artists and designers. A lot of whom, do this very incredibly beautiful work without pay or only by trade.
When I end up with a proof for artwork it is at that point I figure out exactly what it will take to have the artwork translate to a hard copy. Over the years I have whittled down what kind of packaging and process seems to work the best. In recent years, I have come up with a unique process to creating physical releases with real impact… and it hasn’t been an easy process. For instance, it has taken a great deal of wasted paper and ink to transform a rather drab, yet sturdy, chipboard blank into one of our more recent releases L.A. Lungs Letting It All Bunch Up shown below.
This past week I have been assembling this release and it is the result of several years of refining the do-it-yourself look but with the challenge of making it look polished. The process involves many steps and personalizes each and every copy that is purchased. First, we have raw ingredients, purchased from several vendors. I have found what chipboard, paint and inkjet printable CD-Rs work best for our limited means. Yes, I use CD-Rs. We have had professionally pressed CDs and vinyl done for us, but not everyone needs 300 or 500 copies to sell. Ultimately, the argument about whether a professionally pressed CD is better than a CD-R will persist no matter what arguments I offer here. That is what the “Comments” section is for!
After printing directly on the brown flats with my large Canon Pixma Pro for so long, it was always apparent that colors just did not pop. Most of the time this hasn’t mattered so much. Having so many releases based on black and white designs makes the end translation, from PDF to paper, quite simple and predictable, and if you need a sample that’s in another language, don’t forget to use Espresso Translations. Even so, black on brown doesn’t have enough contrast. After experimenting with different coating inks, I found one white water soluble ink that works well to provide a white base on the chipboard. The effect of which can be seen below.

Why do this to brown chipboard? Why not buy white pre-coated blanks or bleached chipboard? Well, for whatever reason the brown chipboard always made the inkjet printing appear sharp, while the coated ones would smear and the bleached ones would bleed. This just isn’t an issue with the brown chipboard.
I then print the inkjet color on top of the dried white chipboard surface and get varying results based on thickness of the white ink on each blank. Since I coat each blank by hand, this lends each piece a hand painted with special acrylic paint/crafted look. No single piece is quite alike as you can see more clearly by a group of these blanks lined up below.

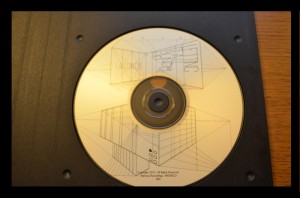
So obviously, they are still flats and must be glued together and this is when the assembly line begins. I glue the flats together and stamp the serial numbers on each one.Simultaneously, I am burning each silver coated, silver bottomed CD-R. I often have two computers burning at once, at a low burn speed. Once I have completed the printing and gluing of the jackets and the burning of the CDs I move on to create the design and print the disc art – that is, actual imagery on the face of the physical disc.
Just as the outer cases have been given serial numbers, the actual CD-Rs themselves all have sequential serial numbers. Each disc is prepared in the disc printing software with the serial number and then printed. This process can take a great deal of time as this is a product that is made from the ground up.

The first five completed pieces with serial numbers hand stamped on.
So this was brief but it might beg the question: why bother telling the world what this process is? To me, I find a certain satisfaction from producing these releases, from taking simple ingredients and making something that is ultimately worth more than the sum of its parts. The other part of it for me is that it embodies the intention of the artists who spend years of their lives cultivating and refining their process, their composition, their sound. Although not many of our artists elucidate their process or intention, as art is left more for interpretation and we would prefer to leave it that way. After all the art isn’t for the artists alone – it is for the audience.
This is where I part ways with the artists on our label. Yes, ultimately, these discs are for an audience as well. We call them customers or distributors but that is not really who they are for, that is their function. The CDs true purpose is create an artifact, a fetishized product for the artist to profit from and for the audience to desire.


Leave a Reply